Showing posts with label hair. Show all posts

Sunday, March 31, 2013

What I Wore: A Pastel Sunday

Hey guys! Happy Sunday! Or Happy Easter! Whatever you celebrate :)
I thought I would share with you my outfit for today. Now before you freak out and go WHAT HAPPENED TO YOUR HAIR, let me share with you a little story! Yay story time! So, I've been thinking about changing my hair for a while. I've had brown hair with bangs for about a year and a half now, and I was bored. So, being the hair-dye addict that I am, I decided to change it up. I've been wanting blonde hair for SUCH a long time, and I decided to go for it...except it came out red.

I'm not sure how I feel about the red right now. I may keep it for a week or so--enough time to let my hair recuperate before I go blonde. Regardless, at least it doesn't look awful.

Because I just got back from vacation, my family and I aren't doing anything special for Easter. But, because I felt it necessary, I decided to dress in a pale pastel pink in the spirit of spring.


Dress: Forever 21
Purse: Thrifted--Goodwill Clearance Center
Shoes: Thrifted--Salvation Army
Bow: American Apparel

What do you think? Should I go blonde, or keep it red?
-Megan
xx

Wednesday, November 28, 2012

Choosing the Right Hair Color


Hello, my friends!
This is my face.
And my hair.
What you may notice is that my hair is (indeed) a dark brown! I'll let you in on a little secret: this isn't my natural hair color!
Although the fact that I die my hair is actually a well known fact, feel special, because I am openly admitting to you that I am addicted to dying my hair.
I have stopped doing it mostly because my hair is becoming incredibly damaged but also because I want to try growing out my natural color to see what it looks like on me.

Now you may be wondering,"If she's stopped dying her hair, what in the world is she making a blog post about it for?"
Well my little question-ers, I am trying to help you out from the mistakes I have made over the past few years! I have had every color (besides the crazy ones, those aren't allowed at my school per dress code) from blonde to orange. I have seen it all on myself and have come to the conclusion that all of those online "guides" to choosing the correct hair color for you are all a bunch of whooie.

As a disclaimer, I am not nor have ever been a professional cosmetologist. I have not been trained in beauty but am just going off of my personal experience. 

Purple hair is absolutely
gorgeous when done right.
It is my personal opinion that a person should have whatever hair color/style they feel most comfortable in. Some people just feel like a blonde with bangs, or a redhead with a middle part. It's all about preference and how you want to express yo'self.

She has the prettiest hair. 
Another contributing factor is how you want others to see you. Although people say appearances don't matter, they most certainly do. If your personality is sweet and innocent and you want people to perceive you that way, it would seem counterproductive to shave your hair and dye your eyebrows pink. Choose a color/cut that represents you, not someone else.

If you don't want to make the full commitment
of dye, ombre/highlighting is a good option.
As much as I'd like to say skin tone and eye color don't matter, they do. Even though they in fact matter, I do not believe that they're as significant as the online guides make them out to be. 
Obviously if you're olive toned or darker you may want to stay away from the unnaturally light and yellow. Just as if you are in incredibly pale, black hair can make you appear ghostly. 
What the guides don't tell you is that you can go for a color as long as it's in moderation. If you're pale, rather than going jet black, go dark brown and it'll seem darker on you.

Random Tip: Black hair dye is extremely to difficult to get out of hair once you've dyed it. Be weary of that and make sure that you want black hair before you actually buy it and use it. I've been there, done that, and now it's incredibly difficult to lighten my hair. 

Another Tip: Deep Conditioner and Leave In conditioner are your friends. If you plan on dying your hair multiple times, attempt to use these at least once a week. Believe me, it will make a difference. 

Before I sign off to head to bed, I just want to leave you with one last thought. Explore all of the options. Before deciding on a color, head to the nearest Walgreens or CVS and peruse through the hair dye isle. Look at all of the different colors with an open mind, and who knows, you may find a color you could never even imagine pulling off. 

Happy Hair Styling!

-M 
xx

Tuesday, November 13, 2012

DIY Floral Crown


Well, I stayed home from school sick today so I decided to post another DIY!
This time it's for those floral crowns that everyone seems to be wearing.
I personally love the look of these headbands, even though some find them a little overbearing.


Materials:
1. Flowers of your choice, at least 5 recommended with metal stems
2. Any old headband
3. Scissors/pliers and floral tape

For your flowers you have complete freedom in what you want to add. I went with sunflowers because they are my favorite flower. If I were to make another crown, I would probably mix it up more and probably add smaller things like leaves and what not.
I found my headband at my local thrift store for 50 cents, so I recommend looking at thrift stores or dollar stores for the headbands. They begin to get a little pricier at drugstores.
The flowers and tape were both found at Michaels. The flowers were 3 dollars for the whole bunch, which is a steal because fake flowers can get a little expensive. After going to Michaels  I went to the same thrift store I found the headband at and found 3 buckets full of fake flowers for a tenth of the price at Michaels. 

Step One: Cut the Flowers


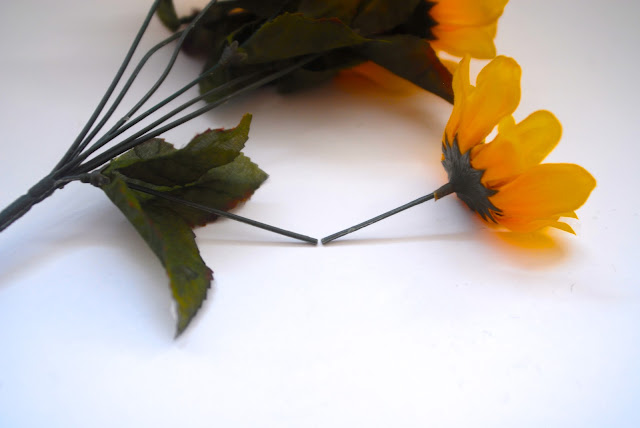
Take your pliers/scissors and start to cut where you want. I usually leave around 2 inches of the stem so I have something to tape onto the headband itself. Make sure to cut the stems all around the same length  to make sure the flowers are equally spaced. Once I cut off all of the flowers, I also harvested the leaves from each of the stems to add them to the crown later on.

Step Two: Start Taping!


Take the stem of the flower and bend it either to the right or to the left (it doesn't matter, but make sure you bend all of the stems the same way.) Once you've bent the stem, hold it onto the headband, take a long piece of floral tape and start taping. I usually start at the base of the flower and just wrap it around covering the entire stem of the flower. Once you have one flower taped, start adding even more! 

This is a failed attempt at me trying to show
you what the taping process looks like!
Step Three: Check for Any Loose Flowers


If there are any loose flowers or exposed stems, just go through with the tape and cover them all up. Make sure the flowers are secure so they don't fall off, but also make sure that they're a little loose so they can be adjusted throughout the day.

Before the added leaves


Step Four: Add Any Other Details

With the added leaves

For me, I just added in three of the leaves I took from the original stems of the flowers. I just kind of shoved them in there and added a little bit of tape. I like the extra details because they break up the monotone-ness of the headband and cover up the gaps.

Step Five: Put it on and Bask in Your Craftiness 
Filters optional!
This is what my finished headband looks like! I would pair it with this burnt-orange dress for a very autumn feeling outfit. I'd love to see what your crown looks like! If you make one email me a picture at thefoxinater@gmail.com :)

www.youtube.com/foxinater
www.chictopia.com/foxinater
Instagram: foxinater

-M