Showing posts with label vintage. Show all posts

Monday, April 1, 2013

Just Call Me Diana.


Hey guys! Happy Monday :)
I've just recently rediscovered my Diana F lens for my digital camera, and I forgot how much I absolutely adore it. I just love how dreamy the photos come out. GAH! I think this picture of me is just... I don't know how to explain it. I feel like it has a story. New favorite lens? I think so.

What is your favorite kind of picture? Mine is definitely dreamy and full of color or black & white. 
Stay lovely!
xx
-Megan 


Sunday, February 24, 2013

Being Creative

Hey guys!
I made a new YouTube video :) I'm finally getting back on my game! Aw yeah!
I'll link it right down here!


I'm trying to be more creative with my videos, and this was this first thing that came to mind!
I hope you enjoy it!
-Megan

Thursday, February 14, 2013

Eyeglass Blues

Hello everyone!
I have been needing to get a new pair of eyeglasses since my beloved black pair broke :(
RIP Megan's Glasses
But since this unfortunate event occurred, I am able to brand-spankin' new glasses!
I've limited my options down to three choices and I'm having the hardest time deciding. What do you think?
This violet pair:
Violet 
This green pair:
Green
This blue pair:

Blue
I think I like the violet the best, but the blue would really make my eyes pop!
Anyway, they are all new-old-stock which means they are vintage, but never have been used and in great condition!
A few more things I have been itching to get my hands on are from--surprise, surprise--Modcloth!
These darling shoes:
This adorable dress:
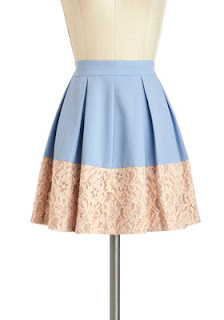
This lovely skirt:
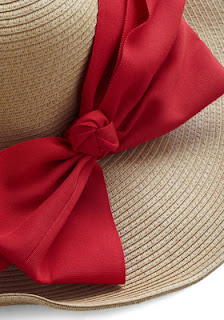
This cute hat:

I absolutely adore every single one of these items, and I am saving up my money to buy at least one!
I hope you found my *wants* slightly entertaining, and maybe it will inspire you to look forward for spring and summer fashion!
As you can tell, I already am :)
-Megan


Tuesday, January 29, 2013

Groovy, Baby.

Hey guys!
Long time no see.
I have come to you with not one but two outfit of the days! How exciting!
*yay Megan you're the best*
Anyway, the first one I want to show you is a school girl inspired outfit, and the second is 70s inspired.
I just want to point out the ridiculous weather patterns of Chicago, first.
This was on Sunday: (10 degrees)


And this was yesterday: (50 degrees)
Dress from Modcloth.

Shoes are thrifted, socks are American Apparel.


The last of the snow.
Shirt thrifted.


Belt off of a dress from Pinupgirlclothing.com

Purse thrifted.

And this was today: (60 degrees)
Shirt from Modcloth.


Shoes from Madden Girl.

Gladiator ring from Modcloth, thumb ring from a Flea Market.


Dress from Modcloth.

Belt from Forever 21.

Ring from a Flea Market.

Me dancing to Françoise Hardy and eating my avocado wrap after it started raining. xD

Rain commences. 

Lucky me, all of this rain will turn to ice when it's 9 degrees tomorrow (as a high)
YAY CHICAGO!
Have a lovely day my friends.
xx
-Megan


Tuesday, December 4, 2012

A Day in the Life

Hello everyone! :)
Again, I can make as many excuses as I want about not being able to post but that doesn't change the fact that I haven't been posting!
My room is FINALLY almost finished! We just need to put in the doors, the carpet, and paint the walls. I AM SO EXCITED!
If you were not informed, I am currently living in our "office" on a blow up mattress. It's awful. But hey, at least I have a bed.
Anyway, for my photography club we were assigned to take a camera around with us one day and take a photo set themed as A Day in the Life.

Rather than taking my digital camera I decided to do something a little different.
A while back my friend and I found a Goodwill selling expired disposable cameras, so of course I bought a few.
All of the pictures below were taken on one of these cameras. Some of them turned out so pretty and others look like utter crap.
Here is the result!

Fell asleep with the computer next to me, haha.

An unusually warm December day.

Odie. Not a wiener dog but a sausage.


Picking out a tree.


Thrift store!


Unflattering angle of my legs!

Our weeping angel.

Lunch at a pub.

Crafting at night!


Tuesday, November 13, 2012

DIY Floral Crown


Well, I stayed home from school sick today so I decided to post another DIY!
This time it's for those floral crowns that everyone seems to be wearing.
I personally love the look of these headbands, even though some find them a little overbearing.


Materials:
1. Flowers of your choice, at least 5 recommended with metal stems
2. Any old headband
3. Scissors/pliers and floral tape

For your flowers you have complete freedom in what you want to add. I went with sunflowers because they are my favorite flower. If I were to make another crown, I would probably mix it up more and probably add smaller things like leaves and what not.
I found my headband at my local thrift store for 50 cents, so I recommend looking at thrift stores or dollar stores for the headbands. They begin to get a little pricier at drugstores.
The flowers and tape were both found at Michaels. The flowers were 3 dollars for the whole bunch, which is a steal because fake flowers can get a little expensive. After going to Michaels  I went to the same thrift store I found the headband at and found 3 buckets full of fake flowers for a tenth of the price at Michaels. 

Step One: Cut the Flowers


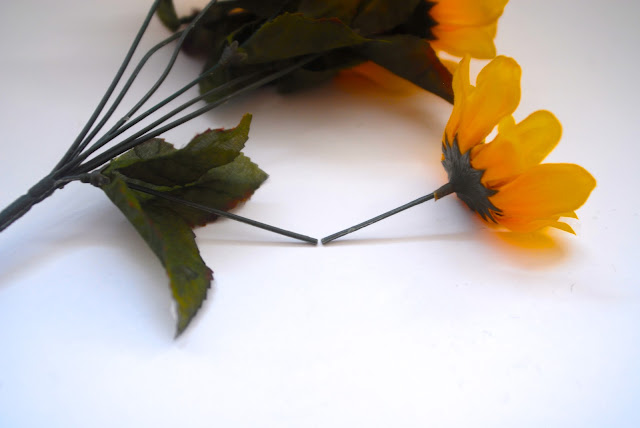
Take your pliers/scissors and start to cut where you want. I usually leave around 2 inches of the stem so I have something to tape onto the headband itself. Make sure to cut the stems all around the same length  to make sure the flowers are equally spaced. Once I cut off all of the flowers, I also harvested the leaves from each of the stems to add them to the crown later on.

Step Two: Start Taping!


Take the stem of the flower and bend it either to the right or to the left (it doesn't matter, but make sure you bend all of the stems the same way.) Once you've bent the stem, hold it onto the headband, take a long piece of floral tape and start taping. I usually start at the base of the flower and just wrap it around covering the entire stem of the flower. Once you have one flower taped, start adding even more! 

This is a failed attempt at me trying to show
you what the taping process looks like!
Step Three: Check for Any Loose Flowers


If there are any loose flowers or exposed stems, just go through with the tape and cover them all up. Make sure the flowers are secure so they don't fall off, but also make sure that they're a little loose so they can be adjusted throughout the day.

Before the added leaves


Step Four: Add Any Other Details

With the added leaves

For me, I just added in three of the leaves I took from the original stems of the flowers. I just kind of shoved them in there and added a little bit of tape. I like the extra details because they break up the monotone-ness of the headband and cover up the gaps.

Step Five: Put it on and Bask in Your Craftiness 
Filters optional!
This is what my finished headband looks like! I would pair it with this burnt-orange dress for a very autumn feeling outfit. I'd love to see what your crown looks like! If you make one email me a picture at thefoxinater@gmail.com :)

www.youtube.com/foxinater
www.chictopia.com/foxinater
Instagram: foxinater

-M